How to Use FREE!ship
- an unofficial tutorial -
Part 2: Forming the Hull - X Axis
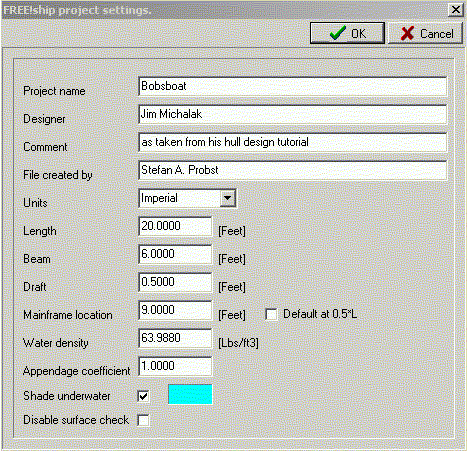
Before we start bringing the hull into the right dimensions we'll do some project settings in the menu Project -> Project settings.
The project name is Bobsboat. Designer is Jim Michalak. You can input a comment and put yourself in as the one who created the file. The next four entries are taken from the initial settings and therefore ok. Our mainframe location is at 11 feet. The problem is, that Jim measures from the stem, while FREE!ship likes to measure from the stern. With an 20 feet long boat, 11 feet from the stem means 9 feet from the stern. So we deselect the "Default at 0.5*L" and enter the 9. Finally I like another colour for the underwater shade. I click on the coloured field, select the new colour and close the colour chooser with OK.
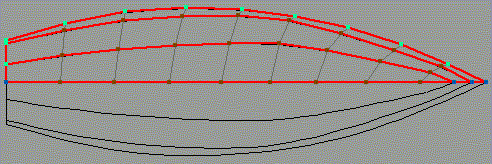
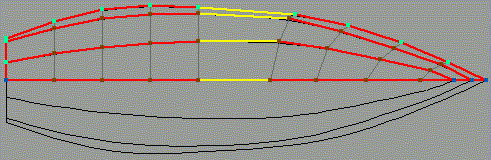
This is how our boat looks now in plan view:
We have to get it into something like this:
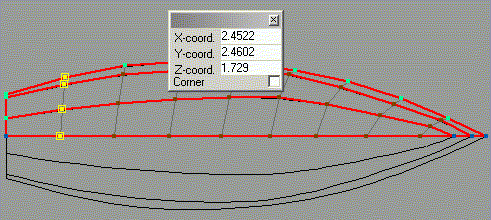
First we'll put all section points in straight lines at the correct longitudinal positions. Let's start with the first one next to the transom. We select all four points by control-clicking on them. We can do this in any view, but I find the Proportianal view the most convenient. This is how it will look now:
The coordinates shown in the small dialog will depend on which point you clicked the last.
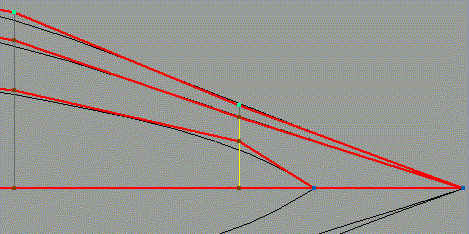
All four points should be at 18 feet from the stem, this is 2 feet from the stern, so we enter 2 as the X coordinate and hit return. All four points will now be set to X=2. To de-select those points, we right-click anywhere in any view and choose "Deselect all". In fact, this de-selection is not necessary for points. Clicking the next one will automatically de-select the previous ones. We repeat those steps for the next 3 sections, until we get this:
If we would have initially choosen 12 points in longitudinal direction, then we just could continue. But we took only 10, so that we can try a feature: to insert points. We want to insert a section at 11 feet from the stem, i.e. 9 feet from the stern. For that we select the four chines where we want to insert the points:
Then we choose from the menu Edge -> Split, or - more easy - just click the corresponding button
 .
.
Four new points will appear, all selected, with a dialog to set coordinates. We enter 9 as the X coordinate and hit return. All four points will be now in one line. This would be enough actually, but for now we want also the corresponding faces to be split. For this, while all four points are still selected, we choose from the menu Edge -> Insert, or - more easy - just click the corresponding button
 .
.
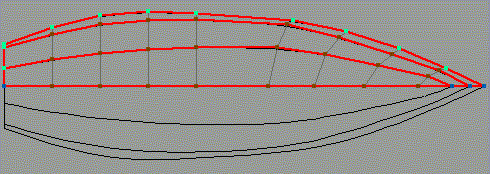
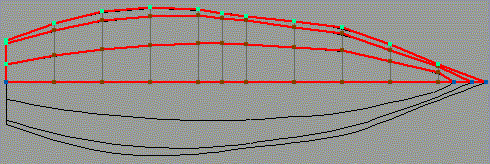
We'll set accordingly the other sections, and will have to add one more section like that. In the end the plan view will look something like that:
We have now all the X coordinates set, except for the stem. How should it look like?
Jim says that the upper plank (let's call it the "sides") should be all vertical and gives one more drawing:
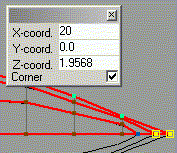
We'll select the two points that determine the stem at the sides and set them to X=20.
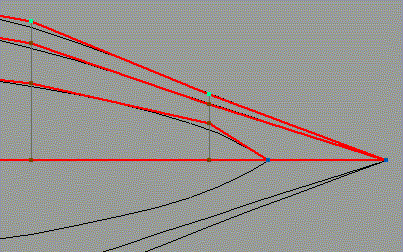
Hit "return" and voila - the stem is straight. From Jim's drawing we see that the bottom panel should start 2 feet behind the stem, so we select that point and set it to X=18. But what happens?
At X=18 there is already the point of the last section. As it turns out, the bottom panel needs actually only 11 points in longitudinal direction. Means: we have to get rid of something. First we'll move the point back to where it was, so that we have clear access to the other items. Easy: just do an Edit -> Undo and we are where we were before.
In order to make it easier, we'll first zoom in the Plan view. Either we do a right click in the Plan view window and then select Zoom -> Zoom in, or - faster - we use the mouse to drag upwards. Means: position the cursor somewhere at the bottom inside the window, press the left mouse button, and while keeping it pressed, move the mouse upwards. That should zoom in. Unfortunately, we see now the middle of the boat, but the area that interests us is to the right. So w do the same, but use the right button. You can move now the drawing until you see the area near the stem.
Now we'll get rid of one section in the bottom and the bilge panel. We select the two edges
and choose from the menu Edge -> Collapse, or - more easy - just click the corresponding button
 .
.
This is how it should look now:
The single point in the keel line we don't need anymore, so we'll delete it:
We'll select it by clicking on it, then choose from the menu Point -> Collapse, or - more easy - just click the corresponding button
 , and it's gone.
Now we can move the frontmost point of the bottom panel to where it should be, to X=18:
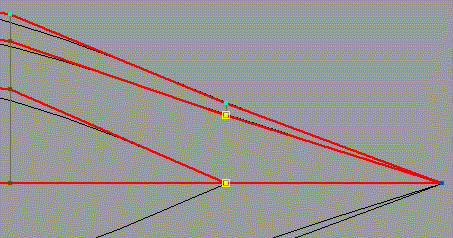
In order to get smoother results, we'll split the bilge panel at X=18. For this we select the two points
and insert an edge with the button.
Voila, looks fine:
and we've covered already many of the hull editing features. We can thus go a bit faster when we set the athwartship Y dimensions in part 3.